Note: We are here to assist you with writing code or help you at any point in integrating the CRM if you need assistance.
Integrating Salesforce with Evrycard can significantly enhance your business operations by seamlessly capturing leads and managing customer data. This guide will walk you through the integration process using custom coding, specifically leveraging Salesforce’s Web-to-Lead functionality.
Why Integrate Salesforce with Evrycard?
- Automated Lead Collection: Directly capture leads from Evrycard templates.
- Streamlined Sales Workflow: Send data to Salesforce for better tracking and follow-up.
- Enhanced Customer Engagement: Improve personalized communication with centralized customer data.
Steps to Integrate Salesforce with Evrycard
1. Set Up Salesforce Web-to-Lead
- Log in to your Salesforce account.
- Navigate to Setup > Web-to-Lead.
- Click Create Web-to-Lead Form and select the fields you want (e.g., First Name, Last Name, Email).
- Salesforce will generate an HTML form for you. Copy the
orgId(e.g.,00DXXXXXXXXXXXX).
2. Customize the Integration
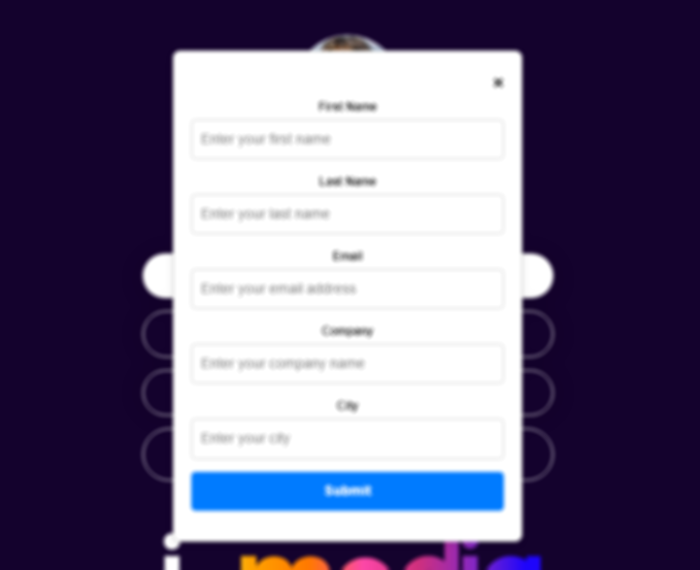
You can integrate the Web-to-Lead form into Evrycard templates using a custom button or a form. Below is an example of a pop-up contact form customized for Evrycard.
Example Integration Code
<!-- Sign-Up Button -->
<button id="signupButton">
 ✉️ Contact Us
</button>

<!-- Pop-Up Form -->
<div id="popupForm">
  <button class="closeButton" onclick="closeForm()">×</button>
  <form id="newsletterForm" action="https://webto.salesforce.com/servlet/servlet.WebToLead?encoding=UTF-8&orgId=place here" method="POST">
    <input type="hidden" name="oid" value="place here">

    <label for="first_name">First Name</label>
    <input id="first_name" maxlength="40" name="first_name" type="text" placeholder="Enter your first name" required />

    <label for="last_name">Last Name</label>
    <input id="last_name" maxlength="80" name="last_name" type="text" placeholder="Enter your last name" required />

    <label for="email">Email</label>
    <input id="email" maxlength="80" name="email" type="email" placeholder="Enter your email address" required />

    <label for="company">Company</label>
    <input id="company" maxlength="40" name="company" type="text" placeholder="Enter your company name" />

    <label for="city">City</label>
    <input id="city" maxlength="40" name="city" type="text" placeholder="Enter your city" />

    <input type="submit" name="submit" value="Submit" />
  </form>
</div>

<!-- Thank You Message -->
<div id="thankYouMessage">
  Thank you for signing up for the newsletter!
</div>

<!-- CSS Styling -->
<style>
  /* General Reset */
  * {
    margin: 0;
    padding: 0;
    box-sizing: border-box;
  }

  body {
    font-family: 'Arial', sans-serif;
    font-weight: 400; /* General font weight */
    background-color: #f4f4f4;
    padding: 20px;
  }

  /* Container */
  .container {
    max-width: 600px;
    margin: 0 auto;
    width: 100%;
  }

  /* Button Styling */
  #signupButton {
    display: flex;
    align-items: center;
    justify-content: center;
    width: 100%; /* Full width */
    height: 60px; /* Increased height */
    padding: 15px 20px;
    background-color: transparent;
    color: white;
    border: 2px solid white;
    border-radius: 30px; /* Makes the button rounded */
    font-family: 'Arial', sans-serif; /* Set font to Arial */
    font-weight: 400; /* Set font weight */
    font-size: 16px; /* Set font size */
    cursor: pointer;
    text-transform: uppercase; /* Capitalize text */
    text-align: center;
    gap: 10px; /* Space between icon and text */
    letter-spacing: 1px; /* Character gap */
    overflow: hidden;
  }

  /* Icon Styling */
  #signupButton .icon {
    font-size: 20px;
  }

  /* Pop-Up Form Styling */
  #popupForm {
    display: none; /* Hidden by default */
    position: fixed;
    top: 0; /* Align at the top of the page */
    left: 50%; /* Center horizontally */
    transform: translate(-50%, 0);
    width: 90%; /* Adjusted width */
    max-width: 400px; /* Fixed size for phone responsiveness */
    margin-top: 80px; /* Space from the top of the page */
    background-color: #fff;
    border: 1px solid #ccc;
    border-radius: 8px;
    box-shadow: 0 2px 10px rgba(0, 0, 0, 0.1);
    z-index: 1000;
    padding: 20px;
  }

  /* Close Button */
  .closeButton {
    display: block;
    margin-left: auto;
    font-size: 22px;
    font-weight: bold;
    background: none;
    border: none;
    cursor: pointer;
    color: #333;
  }

  .closeButton:hover {
    color: red;
  }

  /* Form Inputs */
  form label {
    display: block;
    margin-bottom: 5px;
    font-weight: bold;
    color: #000;
  }

  form input {
    width: 100%;
    padding: 10px;
    margin-bottom: 15px;
    border: 1px solid #ccc;
    border-radius: 5px;
    font-size: 16px;
    background-color: #fff; /* Set background color */
    color: #333; /* Set text color to dark */
  }

  form input[type="submit"] {
    background-color: #007BFF;
    color: white;
    border: none;
    cursor: pointer;
    font-weight: bold;
    transition: background-color 0.3s ease;
  }

  form input[type="submit"]:hover {
    background-color: #0056b3;
  }

/* Thank You Message */
#thankYouMessage {
  display: none;
  text-align: center;
  font-size: 18px;
  font-weight: 400;
  color: #fff; /* White color */
  margin-top: 20px;
  margin-bottom: -20px; /* Adjust as needed */
  letter-spacing: 1px; /* Adds space between characters */
}


</style>

<!-- JavaScript -->
<script>
  // Open the form
  document.getElementById('signupButton').addEventListener('click', function() {
    const popupForm = document.getElementById('popupForm');
    popupForm.style.display = 'block';
  });

  // Close the form
  function closeForm() {
    document.getElementById('popupForm').style.display = 'none';
  }

  // Handle form submission
  document.getElementById('newsletterForm').addEventListener('submit', function(event) {
    event.preventDefault(); // Prevent default form submission

    // Display the thank you message after submission
    document.getElementById('popupForm').style.display = 'none';
    document.getElementById('thankYouMessage').style.display = 'block';

    // Submit the form data to Salesforce
    this.submit(); // This line submits the form to Salesforce as intended
  });
</script>
Steps to Use the Code:
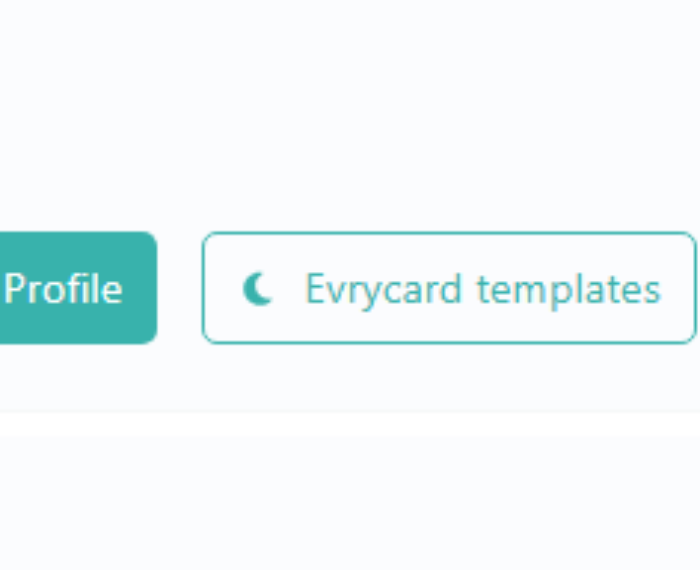
- Add a Custom HTML Block in Evrycard Profile:
- Log in to your Evrycard dashboard and navigate to your profile.
- Go to the add a block section and custom HTML block.
- Insert the provided HTML and JavaScript code (the sign-up button, pop-up form, etc.) into this section.
- Do button customization as you need. If you need any help on writing code, please contact us. We write code free in this case.
- Replace Org ID:
- In the form action URL (
https://webto.salesforce.com/servlet/servlet.WebToLead?encoding=UTF-8&orgId=place here), replaceplace herewith your actual Salesforce Org ID.
- In the form action URL (
- Test Integration:
- After saving the custom code in your Evrycard profile, publish your profile to make the changes live.
- Visit the Evrycard profile as a user, click on the “Contact Us” button, and fill in the form.
- Check Salesforce to confirm the data is correctly being sent and logged into your account.
Testing the Integration
- Submit a test form via Evrycard.
- Log in to Salesforce and check if the lead data has been captured.
- Adjust any fields or styling as needed for the best user experience.
Enhance the Integration
- Add More Fields: Include additional Salesforce fields like “Phone” or “Job Title.”
- Dynamic Data: Use Evrycard’s dynamic variables to pre-fill form fields (e.g., user name or email).
- Custom Styling: Match the form’s style to your branding.
Conclusion
Integrating Salesforce with Evrycard allows you to capture leads effortlessly and manage them in one centralized platform. With custom coding, you can create tailored forms that seamlessly fit into your Evrycard design, providing a professional and efficient lead collection process.
Need help customizing your integration? Reach out to us for assistance!